
In this guide
World Environment Day on June 5 gives schools a useful focus for hands-on environmental learning at school and at home. That’s why we launched exciting projects students can do with their parents, blending environmental awareness with class syllabus topics. As a Principal, I’ve seen the incredible impact of experiential learning firsthand. Let me share some inspiring examples from our school that highlight how we’ve made learning engaging and multidisciplinary across various grades and subjects.
Foundational Stage:
In our FS classes, we have embraced the ideas from the NCF-FS 2022 to create a rich, hands-on learning environment. For instance, during our unit on plants, our youngest learners were not just told about the parts of a plant; they planted seeds in small pots, observed their growth daily, and each one had a plant they had planted in a pot. They observed it grow and when it was big enough to be planted, we gave them the pots to take home and plant in their home gardens. This hands-on activity helped them understand the life cycle of plants in a tangible and engaging way. This also helps foster a deeper connection to the subject matter. We timed it a month before World Environment Day so that they could communicate the same to their parents too. This activity is performed every year with the full month dedicated to plants, veggies, and environmental themes.

Primary Grades:
Similarly, in our primary grades, during a science unit on weather, students became meteorologists for a week. They tracked weather patterns, created weather charts, and even presented their own weather forecasts to the class. This not only reinforced their understanding of weather concepts but also developed their communication skills and confidence in public speaking.
Middle School:
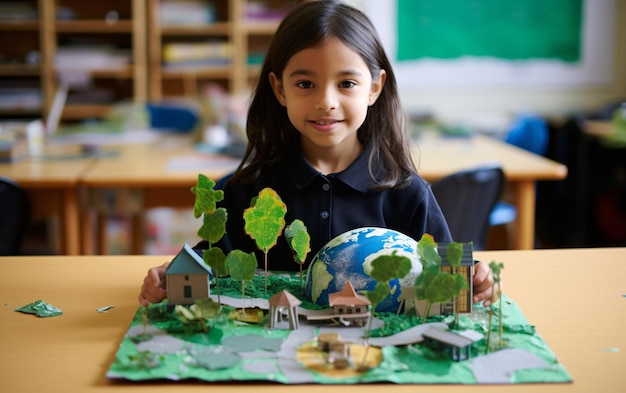
In our middle school, experiential learning takes on more complexity and depth, aligning with the developmental stage of our students. For example, in a geography unit on ecosystems, our students engaged in a project where they created detailed dioramas of various ecosystems, such as deserts, rainforests, and tundras. Each group researched their assigned ecosystem, collected materials, and built their models to reflect the flora, fauna, and climatic conditions accurately. This project culminated in a gallery walk where students presented their dioramas to their peers and teachers, explaining the unique characteristics and importance of their ecosystems. This hands-on activity not only deepened their understanding of geographical concepts but also honed their research and presentation skills.
Higher Grades:
I’ll explain the higher grades in more detail as this took the longest time and discussion for our teachers because of their already busy schedule. We asked students to design an “Eco-Friendly Water Filtration Project.” This included key physics, chemistry, and biology concepts from the students’ syllabus, specifically focusing on motion, gravity, chemical bonds, mixtures, and environmental studies.

Project Overview:
Objective:
Use this project as a non-drinking classroom model: compare how filter layers trap visible particles, then explain the limits of the evidence. Do not taste or drink any sample, including the filtered water. Clearer water does not establish drinking-water safety. NASA JPL’s classroom filtration activity makes the same distinction. The aim is to investigate separation and improve a design, rather than produce drinking water.
Procedure:
- Research and Planning: Prepare a small demonstration sample using clean water mixed with a little soil, under teacher supervision. Use this simulated dirty water instead of sewage, drain water or water from an unknown source. Label the input and collection containers For experiment only — do not drink. Discuss which visible particles a filter might trap.
- Design Phase: Draw and label a filter using cloth or filter paper, rinsed play sand and clean aquarium gravel. Predict what each layer might retain. Plan a fair comparison: use equal volumes from the same well-mixed sample and change one feature of the filter at a time.
- Construction: An adult prepares clean containers and any cut bottle edges. Build the labelled layers over a stable collection container. Do not use discarded chemical containers or ordinary fuel charcoal. A drawing of a charcoal layer is a model, not evidence that this device removes harmful chemicals.
- Testing and Observation: Pour the agreed volume through each design. Record the volume collected, filtration time and visible particles against the same white background. Keep an unfiltered comparison sample. Repeat, revise and explain the change. Keep all samples out of drinking containers; wash hands and clean the work area afterwards. No tasting is part of this activity.
Scientific Concepts Applied:
- Motion and Gravity: Students explored how gravity assists in the filtration process by pulling water down through the filter layers.
- Adsorption and its limits: Activated carbon can adsorb some substances onto its surface; its performance depends on the material and conditions. Ordinary charcoal is not a drinking-water purifier, and this model does not establish removal of germs or harmful dissolved chemicals. The CDC guide to water filters explains why treatment must match the particular contaminant.
- Mixtures and Solutions: A filter can retain suspended particles while dissolved substances may pass through. Clear-looking water can still contain invisible hazards. Ask pupils to distinguish what they observed from what they did not test. Drinking-water systems use controlled treatment and checks; municipal treatment commonly involves several stages, including disinfection. This model is not that complete process.
Assessment:
The assessment for this project was multifaceted, focusing on both the process and the final product. It included the following components:
- Project Design and Report: Students submitted a 3-4 page report that included their research, the rationale behind their design choices, and a step-by-step construction guide. They were assessed on their understanding of the scientific concepts and the effectiveness of their design.
- Practical Demonstration: Each group demonstrated their water filtration system in action, explaining how each layer worked and the principles behind it. This allowed teachers to assess their practical skills and ability to communicate scientific concepts.
- Evidence and limits: Assess the fair comparison, particle observations, records and explanation. Clarity or turbidity describes cloudiness; neither certifies that water is safe to drink. If a TDS meter is available, treat its reading as a conductivity-based estimate of dissolved-ion content, not a test for all microbes or harmful chemicals. A lower number is not a safety certificate. WHO’s TDS fact sheet provides the chemical context. A strong conclusion is: Our filter changed the visible particles; we did not establish drinking-water safety.
- Group Collaboration and Presentation: Students were also assessed on their ability to work collaboratively and present their findings to the class. This included peer evaluations to provide insight into each student’s contribution to the group effort.
Final Thoughts
By sharing these experiences and examples, I hope to inspire other educators to embrace experiential learning in their own classrooms. It’s about creating a dynamic and interactive learning environment where students are active participants in their education, fostering curiosity, creativity, and a lifelong love for learning. I am open to any queries and criticism on what is being practiced.
Leave a Reply